Uploading a genome to RAST
Uploading Sequence Data
RAST accepts sequence uploads in either FASTA or GenBank format.In this example, we will submit a GenBank file.
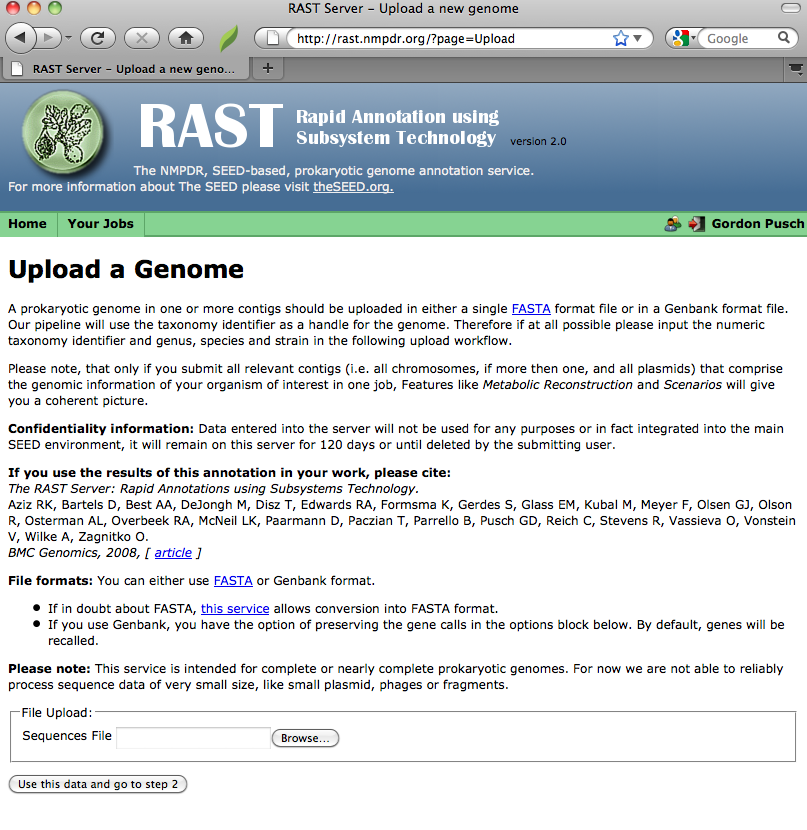
Uploading, Step 1
To upload sequence data, login to RAST, and either click on the "Upload a New Job" link on the front page, or the "Upload New Job" item in the "Your Jobs" menu in the toolbar at the top of each RAST page. You will get a page that looks like this:
Selecting a file
You can either manually type in the name of the file you wish to upload, or, if you click the "Browse" button, you should get some sort of file-selection popup or widget. (The exact appearance of the file-selector will depend on your browser and operating system.)
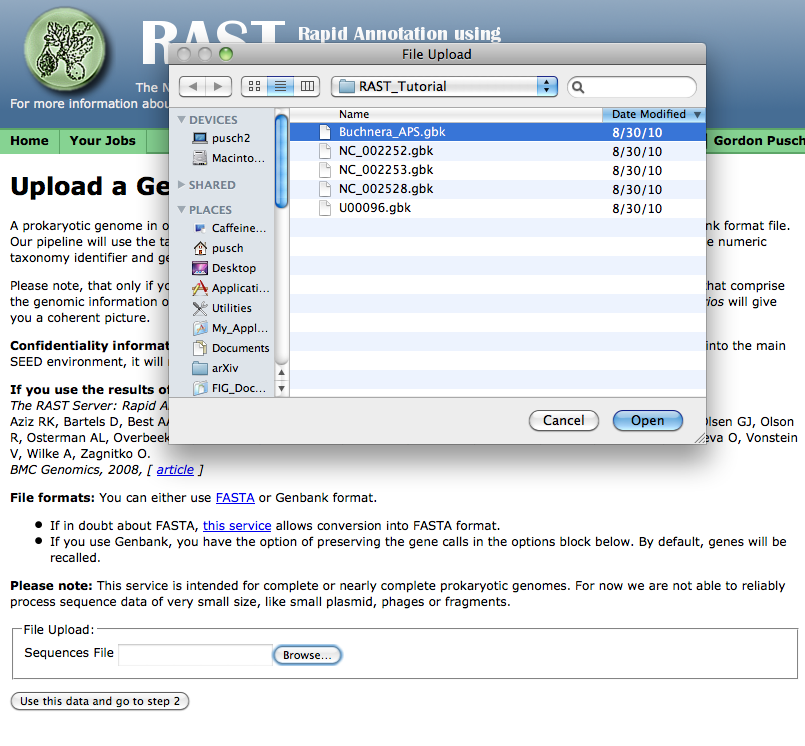
Select the GenBank file you wish to upload, click the "Open" button or its equivalent on your system, then click on the "Use this data and go to step 2." (It will take some time to upload the data -- please be patient!)
Uploading, Step 2
Upload statistics
If your file uploads successfully, RAST will check for some common file-formatting errors, and then display a page showing a number of statistics computed from the received file. You may review these statistics to make sure your file uploaded completely: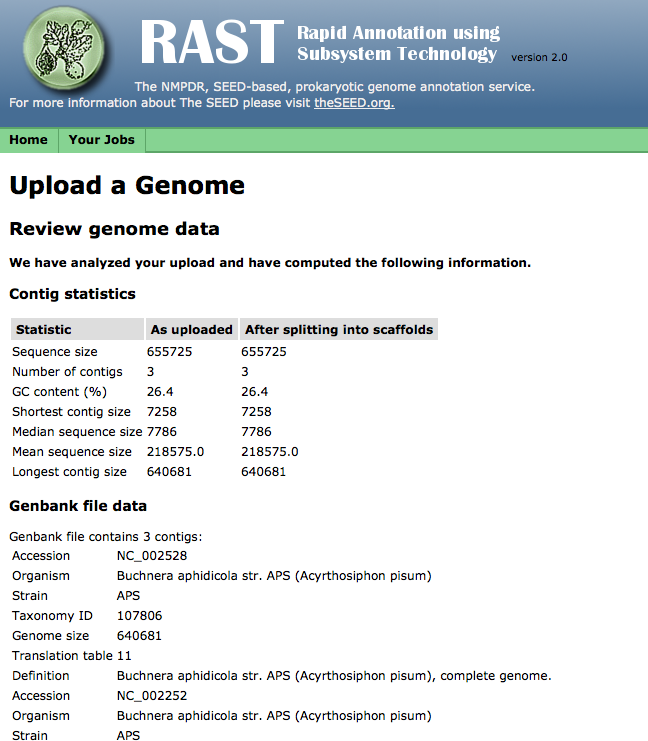
Checking the bio-name of your genome
At the bottom of the Upload Review page, you will find a section for entering the NCBI Taxonomy ID, domain, biological name (genus/species/strain), and genetic code for your genome. When the upload data are in genBank format, RAST will attempt to fill these fields in using the content of your GenBank file: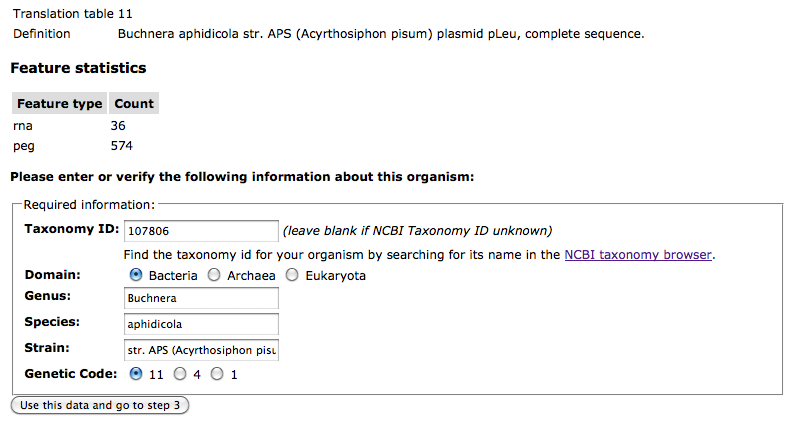 If the contents of these fields are correct, move on to Step 3.
Uploading, Step 3
In Step 3, you can select various options for processing your genome, such as what genecalling method to use and whether frameshift correction and an attempt to "backfilling" missing genes in gaps will be attempted, as well as enter some information about the quality of your contig data. (If you do not know the sequencing quality information requested, you may leave these fields blank.):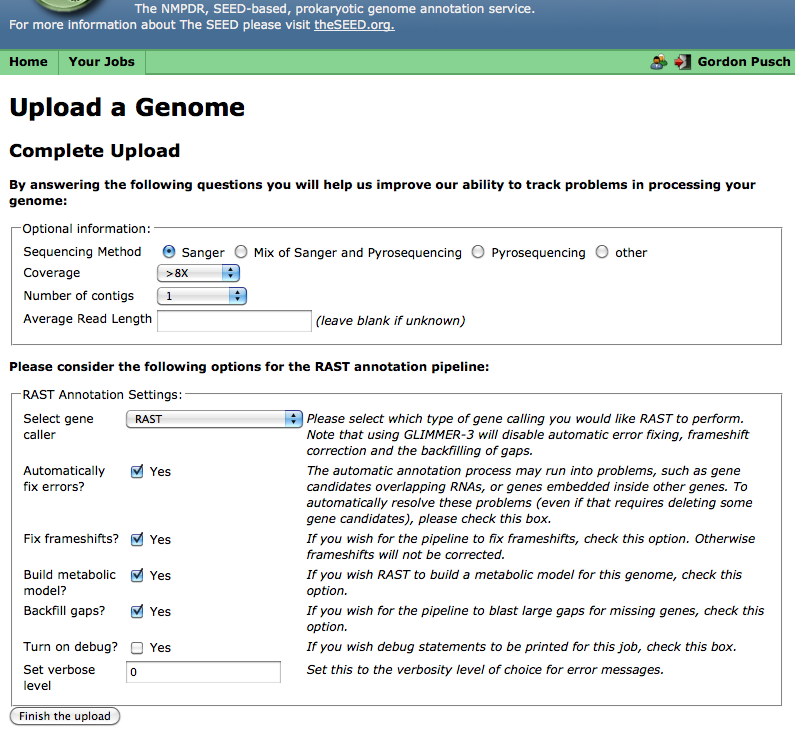
Finishing the upload
When you are done selecting genecalling options, click "Finish the upload;" RAST should then display your job-number:
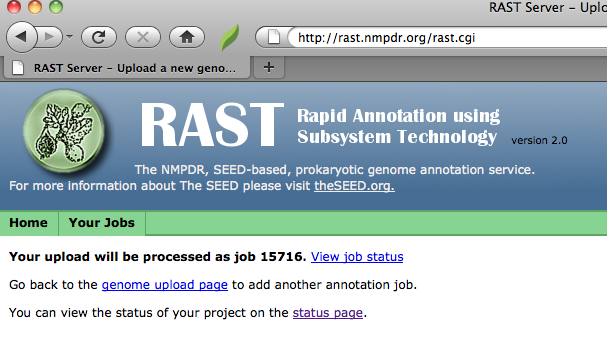
RAST will also display links that will allow you to upload another job,
or to check the completion status of all your jobs.
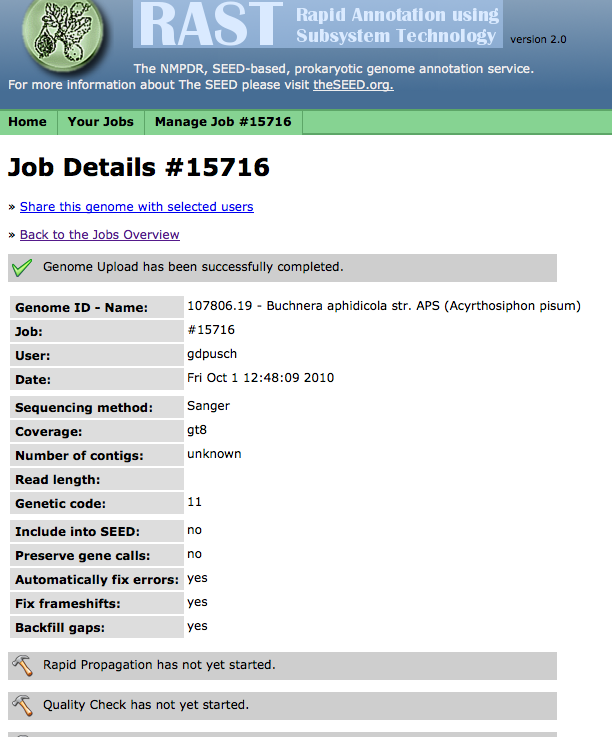
Monitoring Your Job's Progress
Clicking on "View job status" will allow you to monitor the progress of your job. (You can also click on the "status page" link or the "Jobs Overview" item in the "Your Jobs" menu to see all your jobs, then select "View details" for the job you want to check):
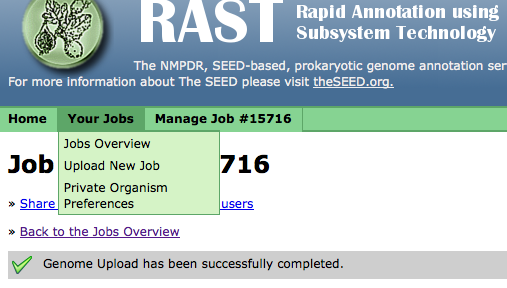
From this page, using the "Manage Job" menu,
you can compare your genome to other genomes once it is completed,
or delete your job when you no longer need it.
Using the "Your Jobs" menu, you can get the overview of the status of all your jobs,
upload a new job,
or set your job preferences:
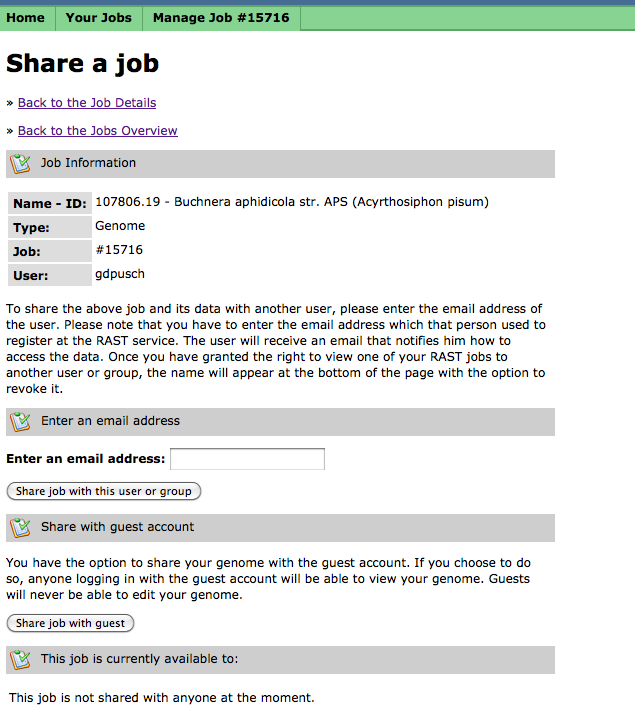
Sharing Your Job
When your job is completed, you can choose to share it with selected users, members of your group of collaborators, or with guest users:
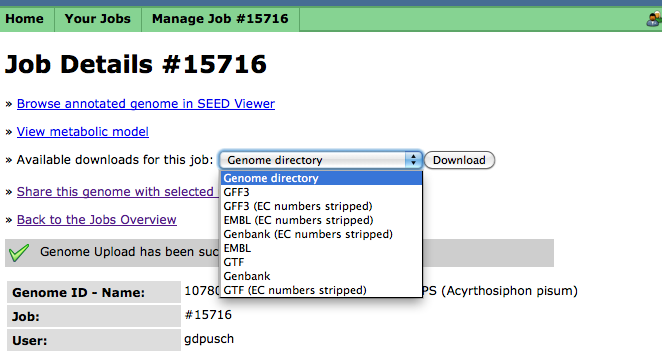
Downloading Your Finished Job
In addition to browsing your completed job using the SEED-Viewer, you can download your completed job in a number of common formats, e.g., GenBank, EMBL, etc. The "Genome directory" format will download a compressed tarfile of the RAST output directory, which may then be unpacked and operated on by various SVR tools:
Comparing Your RAST Job to the Original RefSeq Calls
The SVR toolkit packaged in "myRAST" allow you to compare RAST's calls to the original RefSeq calls:
svr_genbank_to_table  Original.gbk > Original.tab

svr_seed_to_table     RAST_OutputDir  > RAST.tab

svr_compare_feature_tables  Original.tab RAST.tab > Comparison.tab

svr_tab2html 'http://rast.nmpdr.org/seedviewer.cgi?page=Annotation&feature=' < Comparison.tab > Comparison.html
The result will be a table that looks something like this.